Sunday, April 28, 2013

Floral accessories workshop

Did you know that it's possible to make long-lasting accessories with natural flowers? Yes, it is possible, and the result can be awesome! Even if you don't have any gardening skills. That's what I learned last week in a floral accessories workshop for fashion bloggers. It was an event organized by the partywear brand Sayan, and the flower shop The Boj. We had a great time and we learned all the secrets to make floral necklaces, crowns, rings and headdresses. It was the perfect evening for me!
SUPPLIES
_ Floral tape: It's really different from the tape we are used to. It seems it's made of paper but it's kind of elastic. It's kind of greasy, at first it seems it doesn't have glue. But it's so soft and sticks perfectly to natural flowers.
_ Floral glue: This glue sears the flower and prevents water loss, so it stays beautiful during the whole time we are going to wear our accessory.
_ Flowers
Succulent plants: They are perfect for accessories because they don't need much water. In fact, they belong to the family of cactus.
Dry flowers: The ones we used for the crowns. They last for months and their color doesn't fade.
Fresh flowers: Some of them last for only 24 hours but they look so beautiful on special ocassion accessories. 
_ Wire

All these supplies can be found at flower shops.


HOW TO MAKE A FLOWER CROWN
1.  Join two wires and wrap them with floral tape. This way we'll get a stronger base for ow crown.
2. Cut small bundles of flowers and attach them with tape. To make a thick crown, we'll have to combine three groups of flowers at the same place, one on the middle, one upwards and another one downwards.
3. Repeat the same process until you reach the lenght you want for your crown.
4. Cut off any outstanding flowers to give your crown an even shape. Attach a ribbon on each side of the wire to close your crown.
Flower necklace made by América, the wedding blogger from  3,2,1 ¡Me Caso!
Dress on the mannequin by Sayan. I'm wearing a dress from Zara and my DIY crown
One of the challenges of the evening was to create an outfit for a surprise occasion. I had to make an outfit for a hippie wedding on the beach.
Hope you guys liked this!! Would you dare to wear flower accessories??

xxx

Sylvia

Saturday, April 27, 2013

DIY Project: Ice cream top

Hi everyone!
This week I'm going to shelve my sewing machine and my brave DIYs. I do recognize that cutting off a brand new garment might be a little bit scary... So today I'm going back to textile paint, which is one of my favorite DIY supplies. At first I thought of making this project over a long sleeve sweater, but I think this knitted top will be more useful during the next few months. As you guys can see, I followed the pattern of three-phased color block, but I used shinier palette. Here's the video-tutorial, it's in Spanish (again) because 70% of my readers are Spanish speakers. If any of you guys know how to easily add subtitles to YouTube videos please let me know!
I think this is one of the easiest projects I've ever done in this blog. Hope you guys dare with this!

xxx

Tuesday, April 23, 2013

DIY Inspiration: three-phase color block

It's sometimes odd to analyze the way some trends change throughout the seasons. Someday I will write about how the Aztec trend has turned out into something kind of Mayan with a Peruvian hints... But let's get down to this week's issue, which is color block!

Yes, it seems color block is still alive after its great peak a couple years ago. Do you guys remember when the combination of orange and purple seemed to be the best color combination ever? One year later, the color block trend came back in a more subtle way, with pastel tones. And what about today? It looks like this trend is becoming more discreet by introducing neutral colors into the palette. We can see a lot of combinations formed by two intense hues plus one neutral tone. Or even a maximum of three intense colors combined with neutrals. This week we're playing with color block, what do you guys think? What would you do with this inspiration?

xxx

Sylvia

Wednesday, April 17, 2013

DIY Project: Crochet waist dress

Hey! How's everything going?
Today I came up with a DIY which is in between the strappy dress from last week and the crochet inspiration from Coachella. But I'm still not in the mood for that summer crochet look... Not until beachy days arrive. So what I did was to add some lace to this cute high waist dress from Zara. It's totally my style! And now I like it even more. In the end I decided to add some embroidered daisies to conceal the seams, that weren't as prefect as I wished... My sewing machine is totally insane!!

If you don't have a sewing machine you can do this with textile glue, as long as your dress and your lace are thick enough. My dress is made of jacquard, which is a thick fabric, so in my case this DIY would work well with textile glue. But as I have a sewing machine I prefered to use it.
Pictures: Borja Skarsgård
What do you guys think? Would you dare to do this DIY? What would you do to adapt it to your own style?

xxx

Sylvia

Tuesday, April 16, 2013

DIY Inspiration: Coachella & Crochet

Denim dress with lace waistband: Urban Outfitters. Crochet dresses: Asos
Crop top with crochet waist band: Topshop / Black dress with crochet detail: Modmint / White crochet dress: Asos / Floral print dress: Newlook.com

Thursday, April 11, 2013

DIY project: Open and strappy back dress

Here's one of my favorite DIYs I've ever made.  It all started when I came across this dress on the last day of sales at Zara. Despite I loved the robot print, I wasn't sure about the fit of this dress. It was too loose on the top, and too long. Anyway, it was a bargain and I loved the fabric, so it was obviously a perfect victim for my DIY experiments. Now it's one of my favorite dresses.

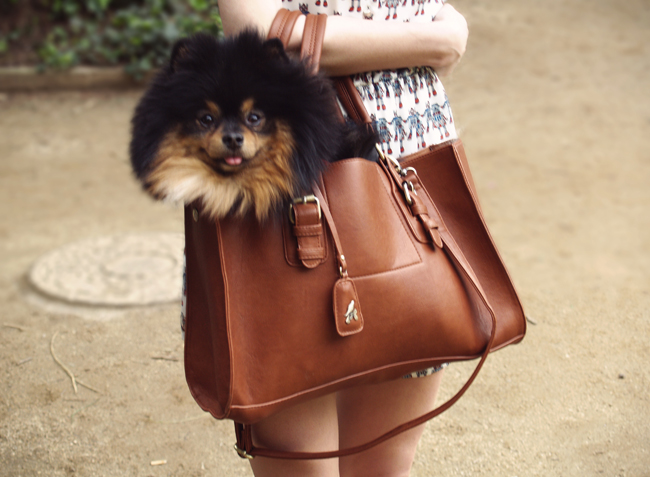
By now, you guys are probably thinking that this will be so complicated. But it's not that hard! In fact, it's much easier than last week's polka dot sweatshirt and infinitely easier that the braided skirt I made two weeks ago. One of the most important facts for DIY success is not being afraid to spoil the garment. You guys should be confident and be able to cut the fabric fearless. Here's the video and my outfit pictures. Today I'm sharing the spotlight again with my dog, Sugus. 

Dress: DIY - original from Zara / Ballet pumps: Pretty Ballerinas / Bag: Nice Things

Hope you guys enjoyed the tutorial. I'm now preparing a post with all the recreations of my DIYs made by you guys. So if you have ever made any of my DIYs please send me a picture!! You can use my email (info@daretodiy.com), my Twitter account (@daretodiy) or you can even mention me on Instagram (@daretodiy).

xxx

Sylvia
Related Posts Plugin for WordPress, Blogger...