Tuesday, June 26, 2012

DIY Tutorial: a transparent bag with interchangeable design

Here we go with our mutant bag tutorial. This transparent bag can become any color in the world. It has a pocket inside that allows you to put pictures, drawings or whatever you want. As I told you in my last post, I used a watercolor butterfly pattern I did myself, and also Hermès Jigè Patterns. This is going to be super easy so I hope you guys like it and Dare to DIY it ;)

Supplies
_ A clear PVC sheet: It shouldn't be too thick, mine is 0,3 mm. 
_ Wool, or a thin string, leather lace...
Wool needle 
_ Felt tipped pen and scissors
_ A magnetic bag closure


I painted this pattern when I was in high school, with watercolors. You can make your own or, if you like this, you can download this one at the end of this post.
I also started making my own design for this bag, but with plastered arm I can't even hold a pencil! I'll finish it as soon as I can paint again :)

DOWNLOADS
Download Butterfly Print* Just for personal use, if you want to use it for another purpose, please ask me - info@daretodiy.com

Saturday, June 23, 2012

DIY Project: the bag that changes its color

I think this DIY is going to satisfy both transparent bag haters and lovers, and also those who wanted an easier version of the envelope clutch. The main piece of this bag forms a pocket, which allows you to put pictures inside (or fabrics, drawings, whatever you want). This changes the design and the style of the bag in seconds. What do you guys think? Do you like the idea?

A few weeks ago, a subscriber asked me to made up a solution in order to make a bag using Hermès Jigé illustrated patterns, which are available on Hermès' Facebook fan page. I totally fell for their illustrations. I thought it was a pity to use them only for a paper bag. I think this is a good solution to make them wearable.
Pattern: Hermès Jigé - Jerome
Pattern: Hermès Jigé - Claire 
For this last option, I used a butterfly pattern I painted with watercolors when I was in high school. I'm very fond of it, but I'll make another design for this bag when my arm is fully recovered. As you might have seen, I didn't use the exact proportions of the Hermès Jigé. This is because I was more interested in the illustrations rather than making my DIY look like what it's not.

Do you guys like it? Have you seen these patterns before? This time you won't be able to complain about the DIY process because there's no easier bag. It has only three pieces and doesn't require sewing machine or glue. I'll post the tutorial soon!

Kisses!

Tuesday, June 19, 2012

Rolling Barcelona

Hi everyone!
The post I am doing today is going to be a little bit different from what I usually do. I am not going to talk about fashion or DIYs. I just wanted to share a few thoughts with you guys. After all, I started this blog to share a part of who I am and the things I believe in, not just to talk about shoes or bags.

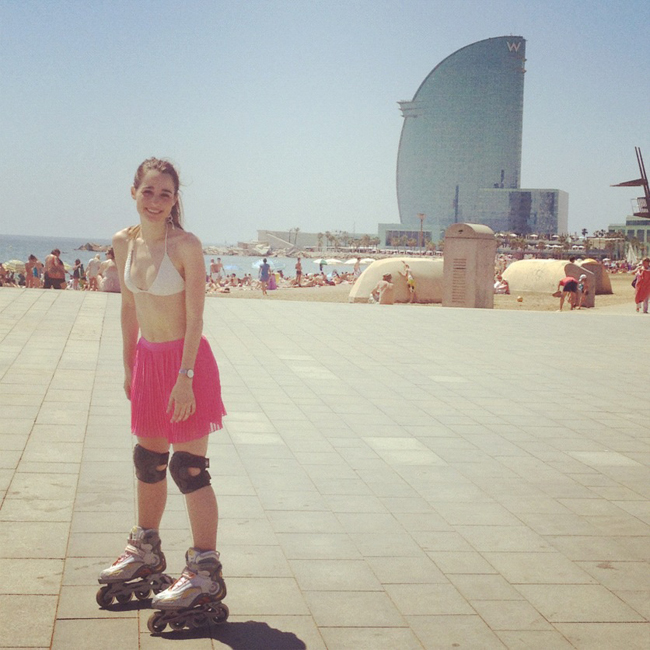
1. One of the most important ideas I try to pass on since my first post is that doing what you love is never a waste of time. These weeks, despite being so busy, I found a little bit of time to go roller-skating. Sometimes we all waste our time in the sofa being coach potatoes and forget about doing what really makes us smile. A few months ago I decided to stop procrastinating with those little things (such as meeting an old friend, painting, writing, learning new things...) and this blog is a great part of that purpose.
2. Once I read that "whoever said you can't buy happiness forgot about puppies".  I agree with this quote, but whoever wrote it forgot about abandoned animals and dog pounds. Let me introduce you to Sharky, the most friendly and lovely dog I've ever seen. We adopted him three years ago, he was in very bad conditions. Playing with his wrinkles, going roller-skating with him or just the way he stares at me can totally make my day. I will never understand how people can abandon their pets. 
Do you remember my necklace? DIY

3. Lastly, as I said yesterday in Twitter (only in Spanish, sorry about that) I've had a little skating accident. It could have been much worse... Fortunately, in ten days I'll be totally recovered and rolling again.

Of course, If I had stayed at home nothing would have happened, but our life passes by and we don't even notice. All this reminds me the fears some of you guys have to DIY. I should say I always get angry or sad when things don't come out well at first (and learning to roller-skate was kind of dramatic for me). But it's really worth it trying again. We all fail (or don't get perfect results) the first time we try. I can't wait for the doctor to remove all my bandages and go roller-skating again. But next time I'll wear wristbands! 

Have fun!

Monday, June 18, 2012

DIY Inspiration: X-ray bags

A few days ago, in my Facebook page I asked the following question: "What do you guys think we can do with a clear plastic sheet and some wool?" And the answer is... a bag! That DIY is going to be the solution to the simplified version of a clutch bag you guys were claiming for. It's going to be super easy!!
I've always found so interesting to see the things people have in their bags. All those items tell so much about the person and her lifestyle. This is why I love that exhibitionist touch that transparent bags provide.  I've been seeking for the perfect transparent bag for years, one that doesn't look like a beach bag. Here are a few examples to fall for.

However, transparent bags have their rules: forget about ugly souvenir keyrings, crumpled papers and all that stuff we usually collect in our daily bags. You are going to show off a big part of yourself, so choose the content carefully.

What do you guys think? Would you get a transparent bag? Do you already have one? Can't wait to show you the DIY, I hope you guys liked the inspiration. 


xxx


Sylvia

Wednesday, June 6, 2012

Aztec print

Pictures: Andrea Feldman Grossman

Skirt: Pippa Lynn for Asos
Sandalis: DIY (click here to see the process)
Necklace: Bimba & Lola (FW 2011-2012)

The other day, after spending too many hours in the college cafeteria, working on a project for my MA with some classmates, we decided to have a break and go for a walk. By chance, we found this huge chalkboard (at least 12 feet high) where people usually stop to draw and write whatever that comes to their minds. There are messages in many languages, from declarations of love to political ideas. We had a sudden inspiration fit: we all were like "grab the camera NOW!!". We had so much fun taking the pictures and laughed a lot, specially because I ended up like a DIY chalk artwork. ¡God save street body painting!

This outfit was not suposed to be an entry for the blog, as I'm not showing any new DIY. However, it's a good example of my daily style. I love combining colorful skirts (eye-catching prints, neon colors...) with neutral t-shirts or tops, just a few accessories and ballerinas or sandals. That's my idea of a perfect outfit.

What do you guys think of aztec print? For me it's one of my favorite trends since it started last year. I hope you guys like this improvised outfit.

Kisses!

Monday, June 4, 2012

DIY tutorial: How to make an envelope clutch

Finally! Here's the DIY tutorial of the envelope clutch bag I showed you in my last outfit. This is a project I did some time ago, when I wasn't even thinking of making my own DIY blog. As you can see, it's not so perfect or so professional, but this is one of my very first DIYs with the sewing machine. What can I say? When I see these awful rookie stitches, I can't help feeling some kind of affection for this bag.

I should say this is probably one of the most difficult tutorials I've ever done. Mostly because it requires making our own patterns and using the sewing machine. However, if you have the least bit of sewing skills, it' won't be difficult for you to follow up the steps. If you can't sew, don't worry: I'm working on a simplified version of a clutch that doesn't require sewing machine.


I don't have pictures of the process so I had to illustrate all the steps. However, I think this way it's easier to understand.

When it comes to supplies, I think it's better to use leather. These kinds of projects require some time and effort, so it's never worth it to work with faux leather. We can easily find very inexpensive remnants. Nevertheless, I do not recommend using thick or patent leathers, unless you are a sewing master. I found it so difficult to work with this metallic leather because I don't have a professional sewing machine.

The first thing you have to do is to decide the measurements you want for your bag, and make the patterns. It's not so different from the technical drawing we all did at school. Around every piece you should leave 1 cm for the sewing margin. Also, it is very important to mark the centers. 


BEFORE YOU START: I recommend doing a first trial on paper or cardboard, sticking all the pieces together with glue. This helps to see if everything fits or if it's necessary to correct the patterns. One you've done this, if it's your first time working with leather or making a bag, do a second trial on fabric. Yes, I know it might be exhausting, but it's better to try than to ruin your leather.

Transfer your patterns to the leather and don't forget to mark the centers with a small tiny cut. As leather can't be tacked or pined, we should use double sided tape.

Start by sewing the two pieces of the front. To achieve a more professional result you can make a parallel stitch to every joint and border. Next, sew the sides to the front. For the back, start sewing the facing of the flap, and then sew that piece to the sides.
Sewing the base is one of the most difficult steps. First, you'll obviously have to turn your bag inside out. It is so important to make the center marks of the base match to the center marks of the body.

Now it's time to sew the facing. This piece helps to connect the body of the bag to the lining. Sew the sides and attach it to the body of your bag. The process is quite similar to sewing the base, but this time you'll have to pay attention to the marks of the corners (not only the centers). Put the magnetic closure before you start with your lining.

The last step is to sew the lining to the facing. To do so, you'll have to put your bag inside your lining (as the illustration above shows). Unfold the facing and sew it by the green lines. Now you have to take your bag out by the hole of the lining, and put everything in its place. Finally, close the hole.

Now you might be scared with so many steps, but with a modicum of sewing skills you are perfectly capable of doing this. My sewing skills are so little (I've never attended to a pattern making, sewing or fashion design class) and I could design and do this bag just a few days after buying my sewing machine.

If you have never made a project like this, I recommend you doing it without base and sides. The process will be easier and faster.


I hope you guys liked this. If you have any doubt, of course you can leave a comment or send me an email to info@daretodiy.com. If you finally Dare to Do It Yourself, please send me some pictures. That would make me sooo happy.

xxx

Sylvia
Related Posts Plugin for WordPress, Blogger...