Showing posts with label bags and shoes. Show all posts

Wednesday, April 2, 2014

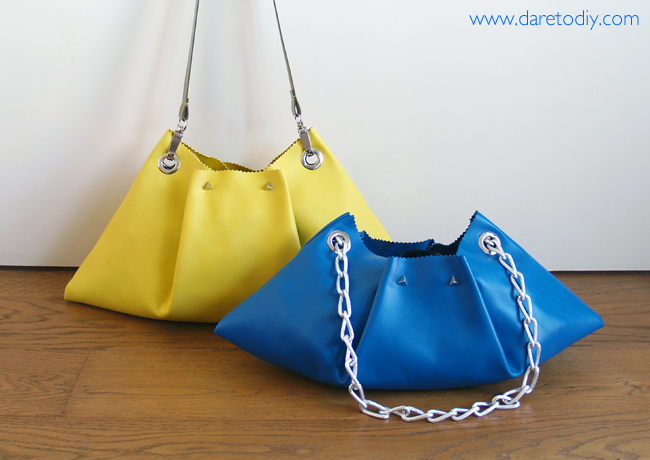
DIY: How to make a leather bag in 10 minutes!! The easiest bag EVER!!!


Hello my dear DIYers!

Last weekend I had the chance of travelling to Madrid to hold two conferences about my experience as a DIY fashion blogger. I ended my speech with a DIY in live so the assistants could see how I make my projects in person. As I didn't have much time, I had to do something quick yet stunning. I obviously had to refuse using any staining materials such as glue, paint etc. So this is what I came up with! A bag you can easily make in 10 minutes that doesn't need much sewing!

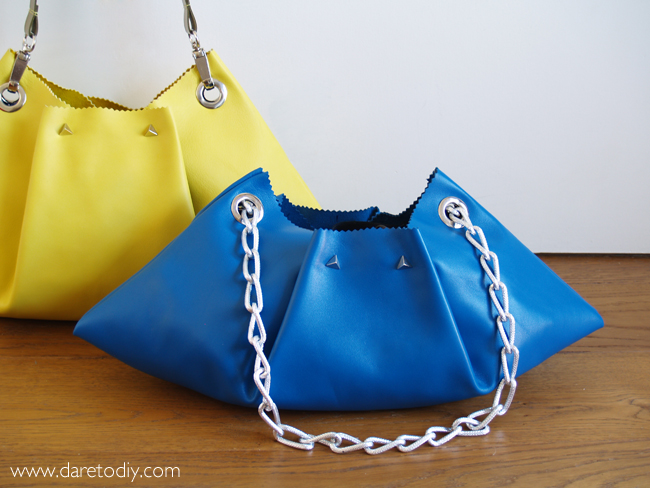
The pattern of this bag is just a rectangle, I folded it in half and sewed the sides. To hold the pleats on the center I used four pyramid screw studs. And to place the strap I put 4 manual eyelets, they work like regular studs, no riveting machine required. All these supplies make everything much easier... Even if you don't have a sewing machine, you could still hand-sew the sides of the bag. 

Hope you guys enjoy the video! As you know it's in Spanish, but I'm seriously thinking of starting a new channel in English. Let me know if you guys are interested!! Meanwhile, if there's anything you don't understand or you don't see clearly on the images, just ask and I'll be pleased to answer!!


The best part of this DIY is that, despite I'm using high quality materials, such as genuine leather, it's really inexpensive. I got the yellow leather piece for 10 euros (it was on sale) and all the hardware for 9 euros more. In the end it was 19 €!! However, having a bag you really like, made by you, is really priceless. 

SUPPLIES
Leather: As we don't have to sew so much, and we are not going to sew several layers of leather, I recommend using thick leather. Your bag will look much better. If you go for a thin leather, you can add some fusing to harden it a little bit. If you do that, you'll also have to add a facing and a lining. 

Manual Eyelets: They provide a professional look, they're super easy to use and don't require any expensive riveting machine.

Screw Studs: They're so useful because they let us make strong joints really easily. They're available in a wide range of shapes and colors.

Carabiners

Faux leather strap: I'm using a faux leather strap because its much easier to sew. Real leather straps for bags are so thick they usually require a professional riveting machine.

Chain: Make sure your chain isn't so big for the eyelets. You can also dress the chain up with some ribbon, here's an example.


What do you guys think? Do you dare to make this DIY?
xxx

Sylvia

Wednesday, March 20, 2013

DIY Tutorial: How to make a tote bag

Lee esto en Castellano
Another week, another DIY tutorial. As I told you it's a tote bag! And it's actually a variation of the bag that changes its color. To add a special touch to this tote bag, I put a transparent pocket in the front that lets you put photos, magazines or whatever you want. Just like this transparent clutch bag.
Top from Zara, leather skirt from Asos & DIY shoes
Pictures by Borja Skarsgård

I've always been told that it takes the same effort to make things well, than to make them poorly. I'm not really sure about that, but I know for certain that making things poorly only leads you to waste your time. Because you'll probably have to do the same thing twice. This is why today I'm going to show you guys how to make a real bag, as professional as possible. However, you'll see that it's not so hard to make. This make is made of just two pieces, it has no base or sides. In fact, it's much easier than the envelope clutch I showed you guys last year.

In the beginning I thought of making some sort of window in the front piece, to change the design from the inside. But that would have been too complicated, and it made no sense... In the end I decided to put a clear plastic sheet between the front and the back to create a pocket just with one stitch.
SUPPLIES
_ Leather or fabric for the outside of the bag
_ Fabric for the lining
_ Transparent plastic
_ Thick fusing
_ Pins and double sided tape
_ Cardboard (to make the patterns)
_ Tailor chalk
_ Sewing machine and iron


Optionally you guys can make some seams on the edges, on the sides of the straps and on the two sides of the main seams. I didn't do it because I don't really trust my sewing machine. It's not a professional machine and it sometimes makes awful stitches on thick fabrics. I didn't want to take that risk.

Hope you guys like the video too. It's in spanish again, sorry about that, but 80% of my readers on my main blog (daretodiy.com) are spanish speakers. Anyway, everything is explained on the illustrated tutorial above. Hope you guys enjoy it anyway! 


If you have any question just ask ;)
xxx

Sylvia

Friday, March 15, 2013

Pick your DIY: the 7 DIYs you chose

Lee esto en Castellano
So we're ending this week with a huge DIY binge! These are the 7 DIYs you guys picked on Pinterest for our Pick Your DIY Challenge. Thank you so much to all of you who voted and those who submitted your DIY suggestions. Here are our projects:
Chanel Butterfly bag by Carly from Chic Steals (Portland, EEUU). Don't miss her tutorial. Really awesome!!
Alessia from A Matter Of Style (Italia) made these amazing shoes by L.K. Bennett. Click here to see the tutorial.
By Charley from Chic. Tutorial here.
Cross back shirt by La vie en Rose. Tutorial here
Donatella from Inspiration & Realisation dared to recreate Dolce & Gabbana's Spring collection. And she did a great job, don't you think? Tutorial here.
Cat from Cut Out & Keep (Edimburg UK) made this supercute bow clutch. Tutorial here.
And the last one: my DIY. These ballerinas with dettachable lip brooches. See the tutorial here

Hope you guys liked or projects. Have fun and seize the weekend!

xxx


Wednesday, March 13, 2013

DIY Project: Ballerinas with detachable lips

So finally we are starting to see the results of Pick your DIY Challenge in which I was invited to take part, alongside 6 other prestigious DIY bloggers worldwide: Chic Steals (Oregon, US), A Matter of Style (Milán, Italia), Chic Cheat (Inglaterra, UK), Inspiration&Realisation (Massachusetts, US), Cut Out and Keep (Edimburgo, UK) and La Vie en Rose (Michigan, US).

I picked Charlotte Olympia's "Dolores" shoes from the most voted pictures on Pinterest. I really loved her cap toe lips heels. However, I'm not in favor of those kind of DIYs which main purpose is to look exactly like some luxury product (but in a rough way, of course). I think that DIY must be a process to personalize our clothes and to materialize an inspiration. A good DIY should have it's own personality. So I took Olympia's cap toe lip shoes as a reference and created two detachable leather brooches for these pair of silvered ballerinas. 
The technique is so easy. You guys just have to cut and glue, as we all did in school but using leather. On the other hand you can also follow my DIY steps to create an infinite range of designs, or even use this brooches to create accessories such as rings or necklaces. Here's the vídeo:

I used leather (as I always do), but if for some reason you are unable to find leather near where you live, you can also use felt. 

As I always say, I hope you guys got inspired or, at least, had fun watching.

xxx

CLICK HERE TO DOWNLOWAD THE LIP PATTERN

Click here to see another DIY project with ballerina flats (the same ones in pink)

Sunday, December 16, 2012

DIY shoes series vol.2 (video)

Lee esto en Castellano
The other day I uploaded the second video in my DIY shoes series. Actually, I wasn't going to create an entry for this, because you guys already know this project. It's the one I did for the Craft Wars, but I obviously had to wait for a few weeks to share it. Hope you guys like it anyway :)
  Stay tunned because there are a lot more projects coming up! I just can't wait to get a few days off this Christmas... I think I will just stay home making new DIYs and videos. That's my idea of a perfect Christmas time, what's yours? By the way... Have you guys made any DIY to decorate your homes this holiday season? I would love to hear about it!

xxx

Sylvia

Wednesday, December 5, 2012

DIY Project: Beaded Heels


Lee esto en Castellano
Today I'm so happy because I finally can show this project, which is by far one of my favorite DIY's I've ever done. If you like these shoes, do not hesitate and make them! The difference between having a regular pair of peep toes and having one like these is just 40 minutes of DIY (about 20 minutes for each shoe). I'm explaining everything on the video, don't forget to activate the subtitles in English ;)


Saturday, December 1, 2012

Craft Wars! The die has been cast

Lee esto en Castellano
I'm so glad to finally being able to show you guys my project for Buzzfeed's Craft Wars.

When it comes to DIY, sometimes the fear of spoiling the garment we want to customize pulls us backwards. What I did was to create a removable accessory with studs that lets you totally change the look of your shoes when you want them to be a little bit more eye-catching, but also lets you go back to your neutral shoes if you want to. For this craft challenge, I chose these black peep toe shoes, but this DIY is suitable for any kind of heeled shoes, even boots. 

Besides, this crossed strap will add an extra holding to your feet and will make it easier for you to walk in your court shoes. I don’t know if this also happens to you guys but sometimes, the heel of the shoes doesn’t keep my feet in place when I walk, so every step I make the shoe comes out, no matter if it’s my right size. This is so uncomfortable because I have to give walking my full attention.


Don't forget to vote!
The die has been cast

Sunday, October 7, 2012

Youtube... Here We GOOOO!

So THE DAY finally arrived: now you guys can subscribe my Youtube channel!!
During the recording, I've had loads of technical hitches that almost made me lose my temper. However, here's the video... It's not even close to what I wanted, but I hope to improve the quality of my videos soon.

At first, I thought of making all my videos in English, or even of making another Youtube channel in English. But I have enough with two blogs (my main blog in Spanish, and this one). However, if you guys are interested on seeing some of my videos in English, please let me know. 

Probably most of you guys already know this project (I did it here), but it was important to me to start off this Youtube adventure with one of my favorite DIYs. 


As always, I hope you guys like it! I'm looking forward to hear feedback from you guys, I need your sincere opinions to improve my work. Also, If you guys could subscribe the channel that would help me a lot.

Thank you so much for your support!!

xxx

UPDATE: I just put subtitles in English. You just have to activate them by clicking on the subtitle icon bellow ;)

Friday, September 21, 2012

DIY Project: feline instinct

During the last few seasons there has been an animal invasion on feet of world's blogger population. It all started when Mr. Marc Jacobs gave all his mice collection to Miss Salad. And then Charlotte Olympia came up with her cat slippers to claim her share of grown-up Lolitas' market. 
The DIYer sector reacted so fast and made incredible DIYs inspired by these two icons. PS I made this made a perfect copy of Olympia's shoes, and my dear Momita made a beautiful pair of mice ballerinas. But, as I told you in my last IGers post, the interpretation of cat shoes made by Tiny Toadstool totally amazed me. I've never done a DIY designed by another blogger and I don't want this to set a precedent, but today I'm showing you my version of this super cute booties.
Image via Tiny Toadstool
My DIY process is a little bit different than Tinytoadstool's. Instead of using doll plastic eyes, I made them in leather. And I also made the nose in silvered leather.


I love crossed-eyed characters, this is why I put the pupils randomly ;)

Hope you guys like it!

xxx

Friday, September 14, 2012

DIY Project: leather collage

Lee esto en Castellano
So my DIYs are definitely back!
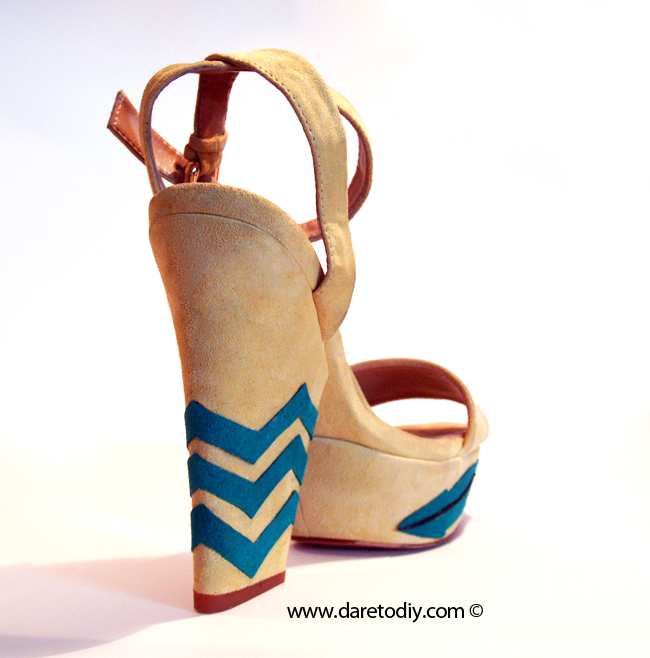
Yes, I know there's a week left for the official end of summer, but I'm one of that kind of people who doesn't get rid of sandals until November. Living in the sunny Barcelona has many advantages! And yes, I know that many of you guys are now putting away your summer clothes, and might not be in the mood for sandals. However, this DIY can be done on any kind of shoes, such as booties or court shoes. In fact, my first intention was to make this leather collage project on a pair of pumps, but I couldn't find the right ones. These sandals seemed just perfect.
And here's the tutorial, you'll just need a leather or suede remnant, scissors and textile glue. Let's get down to work!
Textile glue works awesomely well on leather, but you have to be really careful. Once it's dry, it's almost impossible to remove it without breaking the garment. 
At first, my idea was to fully cover the shoes with leather leaves. When I started DIYing this I didn't actually have an idea of what I wanted, but this is what came out. I had serious doubts about covering all the heel with these zig zag shapes, or the whole platform with smaller leaves. 

I hope you guys got inspired! You might don't like the colors, the shapes or whatever: I do recognize this design is a little bit weird. However, I believe this technique can be so useful for all of you. We can play with a lot of different designs, colors or apply it to any kind of shoes. I'll definitely use this technique again, I loved the result!!

What do you guys think? Have you ever worked with leather?

Sunday, August 5, 2012

DIY Project: Dancing with sneakers

Hi everyone!
Here's the DIY process of the sneakers I showed you in the last post. As you might have seen, it's a very simple design that makes the process so easy and fast.
Pictures by Mariona Olmos from MW Photography
Zapatillas: Primark
Finally, I covered the red lines from the sole with a white permanent felt-tipped pen. Unfortunately. the white ink doesn't work well on many surfaces (same happens with metallics) and after a while it started to crack. So I recommend you using sneakers without colored lines or leaving the lines in their original color.

I have done a pattern of my design, and also one of an stiletto like the one on the sneakers I that inspired this project. You can download the pattern here.

I hope you guys got inspired!!

xxx
Sylvia
Related Posts Plugin for WordPress, Blogger...